ADS interface Initial setup tutorial
Tutorial for initially setting up the simulation interface. This has to be done once for the process node, in order to get all the correct configurations done.
The emStateFile.xml required for the simulations and setting the simulation settings is a process dependent file, which is difficult to manually change. Therefore the following steps are introduced with figures to set the default values such that the implemented script may easily set the stateFile to correspond to correct values. It is very important that the names and values are set to the ones given below, as these are used to change the simulation settings.
Open GUI, create a new workspace called “WORKSPACE_placeholder”
Name the library to “WORKSPACE_placeholder_lib” (this should be default from workspace name)
Create a new layout in the workspace, and name it “CELL_placeholder”, and select your process dependent substrate. This may require adding some technology files to the workspace, similar to normally setting up a library in ADS. This step may also be performed in Virtuoso, by naming the workspace, library and cell as instructed earlier and adding the library in ADS GUI.
Open the emSetup view from the layout view.
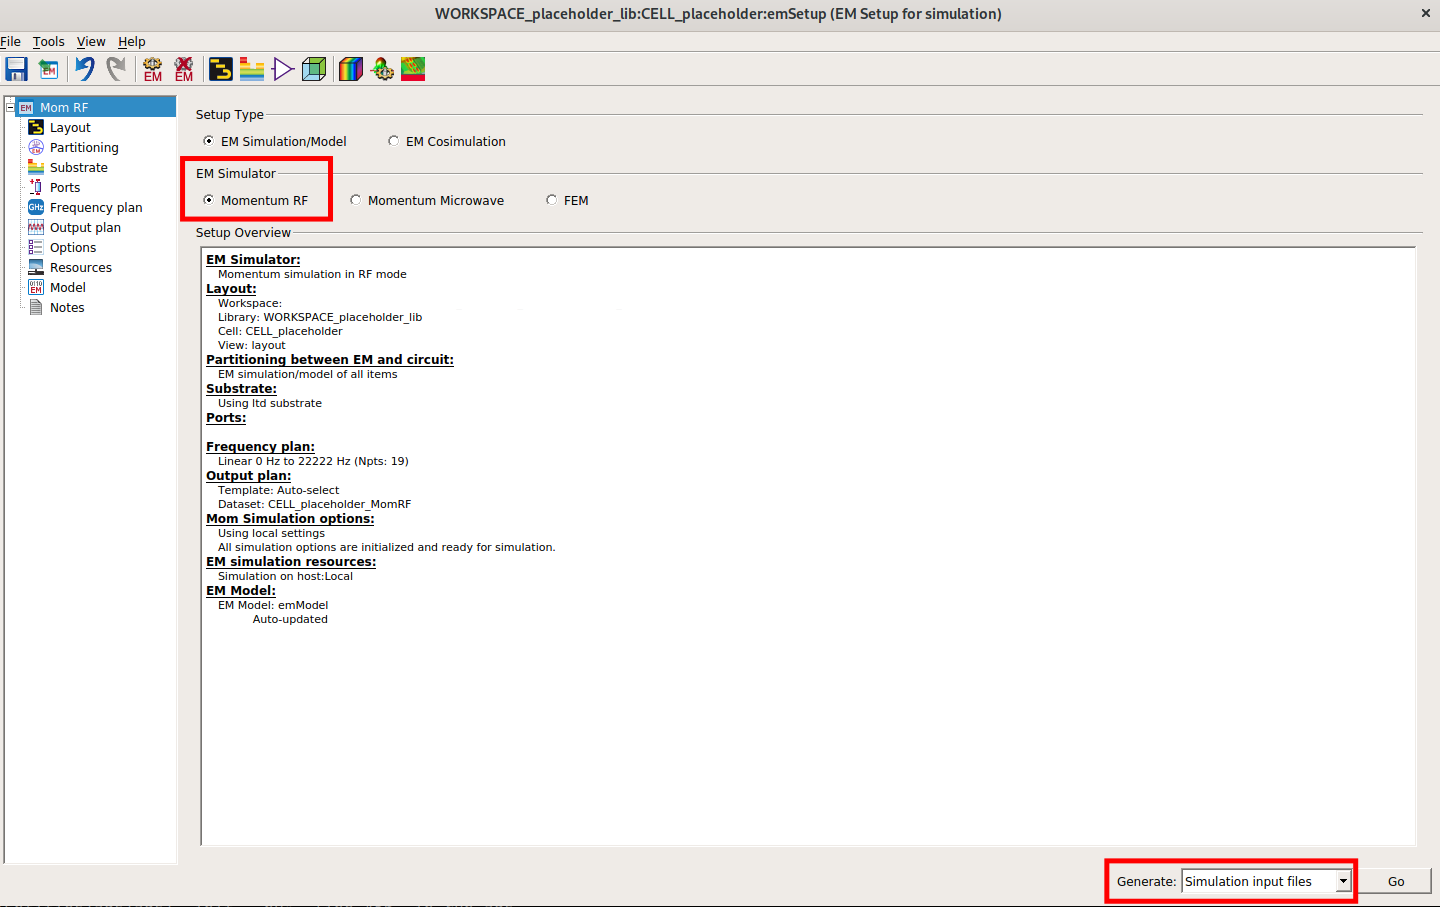
In the first view (“MOM uW” or “MOM RF”), change EM Simulator option to “Momentum RF” and change “Generate:” (in bottom right corner) to “Simulation input files” as shown in below

In “Substrate view”, select your process’ substrate
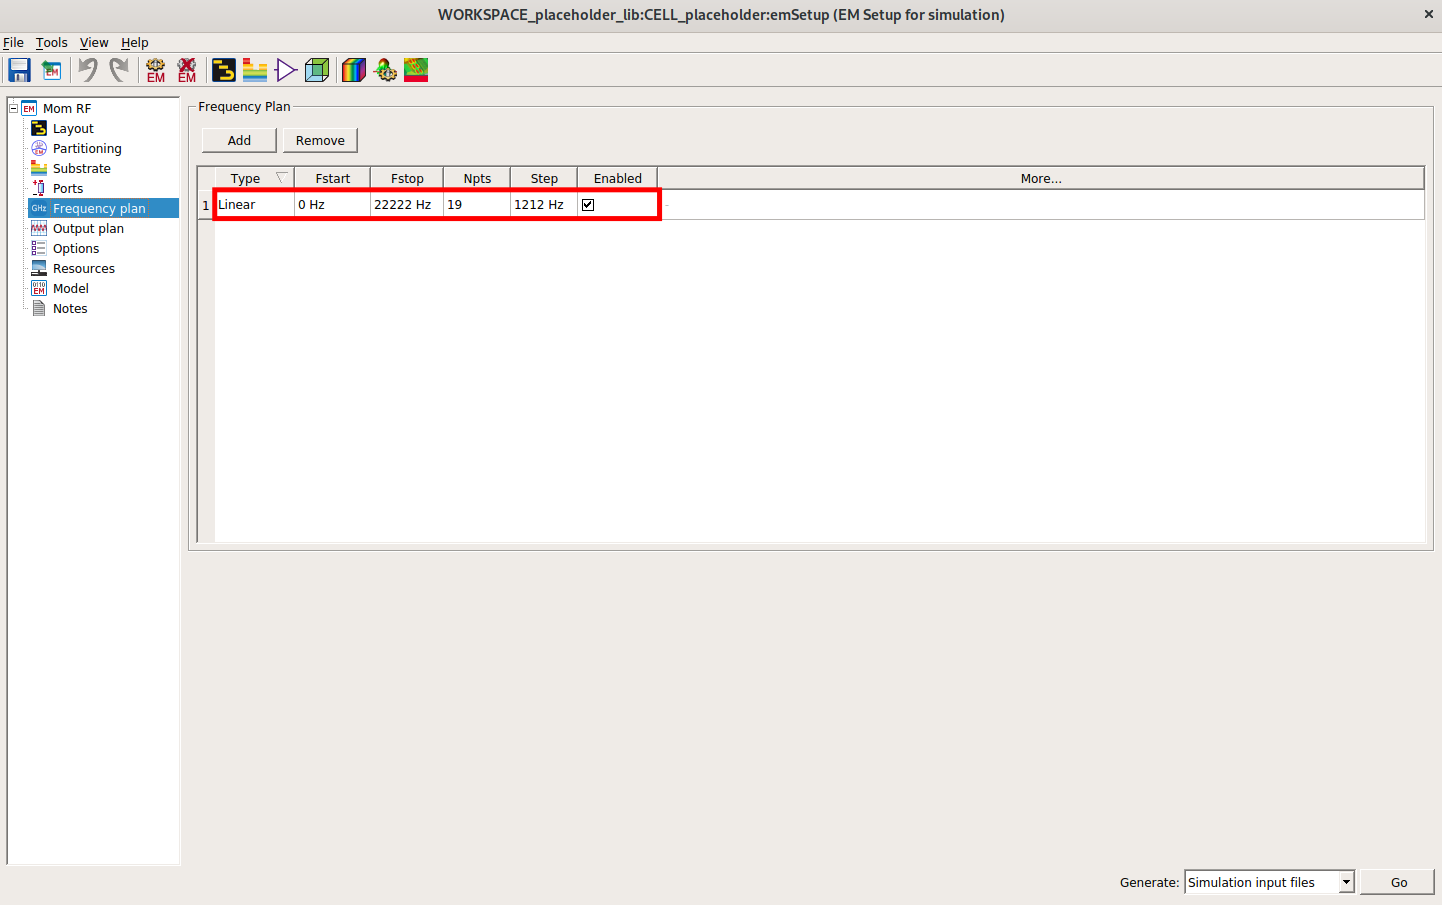
In “Frequency plan” view, set Type: “Linear”, Fstart: “0 Hz”, Fstop: “22222 Hz”, Step: “1212 Hz” as shown in figure below. It is very important to change the unit to Hz, instead of GHz.

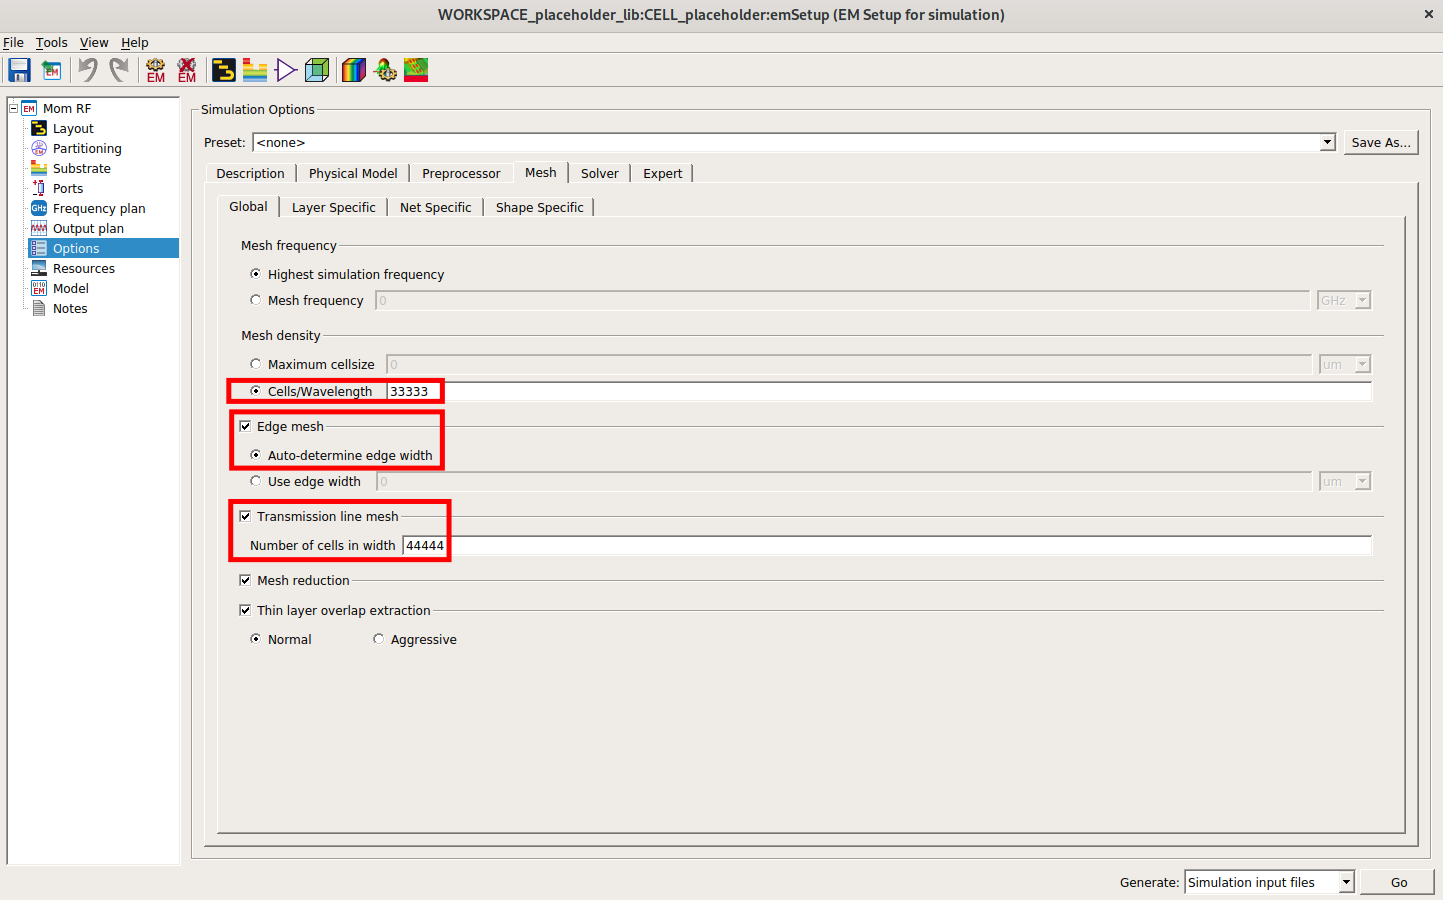
In “Options” view, go to mesh and in “Mesh density”, select “Cells/Wavelength” and set it to “33333”. Enable “Edge mesh”, with the option “Auto-determine edge width”. Enable “Transmission line mesh”, and set it to “44444”. The view is shown in figure below

Save the EM Setup view.
Move the generated emStateFile.xml (should be ./WORKSPACE_placeholder/WORKSPACE_placeholder_lib/CELL_placeholder/emSetup/emStateFile.xml) to this ads folder to ./adsfiles/emStateFile.template
Add line “EMSTATEFILE=${THESDKHOME}/Entities/ads/adsfiles/emStateFile.template” and line ADSSUBSTRATEFILE=”<path_to_process_substrate_file>” to configure in TheSyDeKick project root, and run “./configure”.
The design kit requires an environment variable VIRTUOSO_DIR, which refers to path to your virtuoso directory (folder that contains cds.lib).
Then clone ads_template entity, and change “TECH_FILE_NAME” variable in link_oa_design.sh to the correct filename for your technology. After this run “./configure”.
Congratulations, you’re done.
Initially written by Veeti Lahtinen 2022.